Trust Vega’s API lets you request a customer review automatically when a significant action happens in another app, such as your appointment system or eCommerce store.
Zapier is an automation service that makes it super simple to connect different web apps together, using workflows called “Zaps”.
Using Zapier, you can easily connect Trust Vega’s API to thousands of other apps and web tools, without needing to hire a developer. And in many cases, the Zapier connection is free.
Table of Contents
So What Exactly Is A Zap?
A Zap is simply a connection between two separate systems that translates the information being sent by the first system into a format the second system can easily understand.
You create one by telling Zapier which two systems you wish to connect, and how the data should be translated/mapped between the two systems.
Zapier offers pre-built connections with thousands of web apps, so chances pretty high that you will be able to connect it to your appointment system, ecommerce store, payment processor, or even a Google Spreadsheet without needing any help from a developer.
You can register for a free Zapier account here.
Creating A Zap That Requests A Trust Vega Review
Creating a Zap between your app and Trust Vega is pretty simple, and is a one-time setup.
Here’s how.
Step 1: Make A Zap!
Login to your Zapier account and select the button to Make A Zap!

First, name your Zap (so you remember what it’s for later) and then select the application you wish to connect to Trust Vega. This is known as the Trigger App.
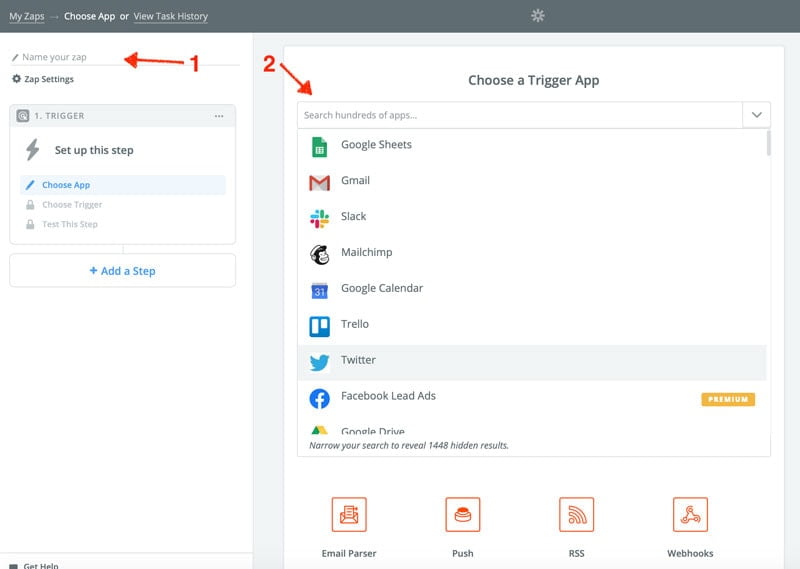
Step 2: Configure Your Trigger App
Next configure the Trigger App you’ve selected. This will vary, depending on the app you want to use, and you may need to consult your app’s support pages to find out how.
For this tutorial, I’ve chosen to use a Google Sheet as my trigger app, and Zapier lets me trigger the zap any time a new row is added or updated. Cool!
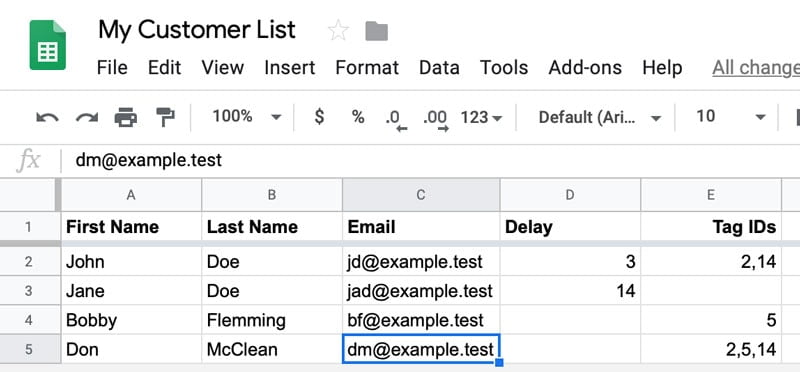
Step 3: Configure Your Action App
We’ll be using Zapier’s built-in Webhooks App as the Action App. This lets you translate the data into a format an API, such as ours, can understand, as well as send it to us.
So firstly, select Webhooks as the Action App.
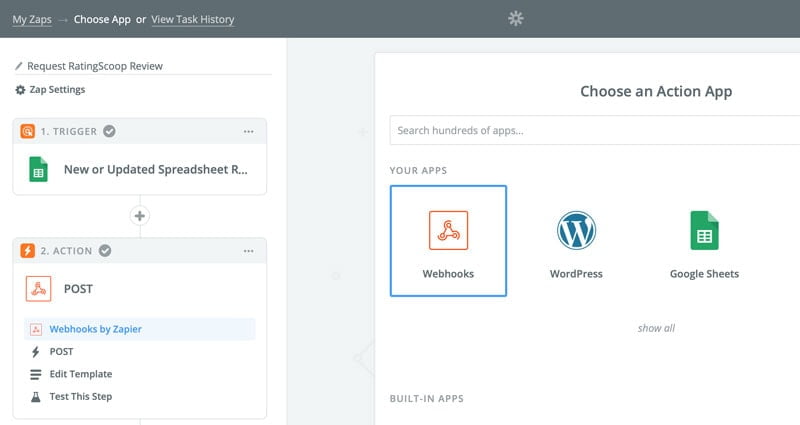
And then choose POST as the action.
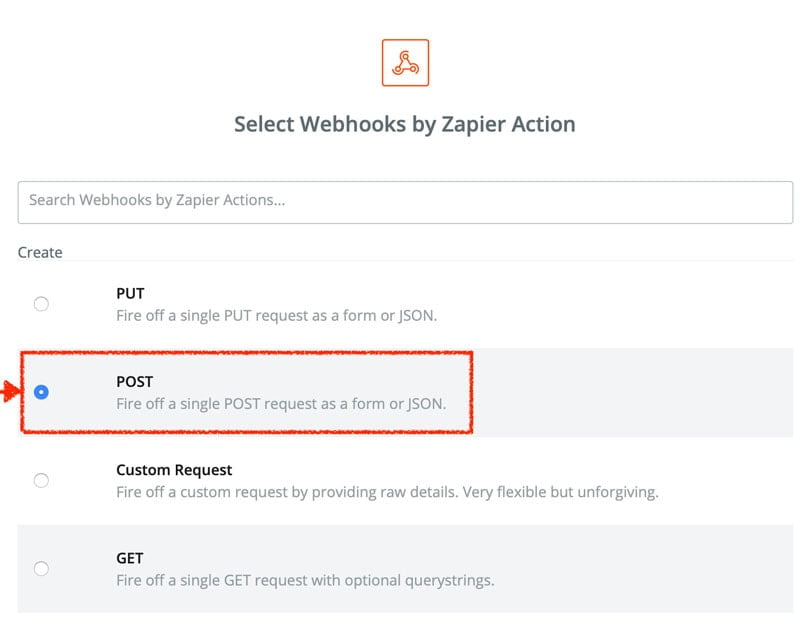
Next, we tell Zapier how to send the data from your Trigger App to the Trust Vega API.
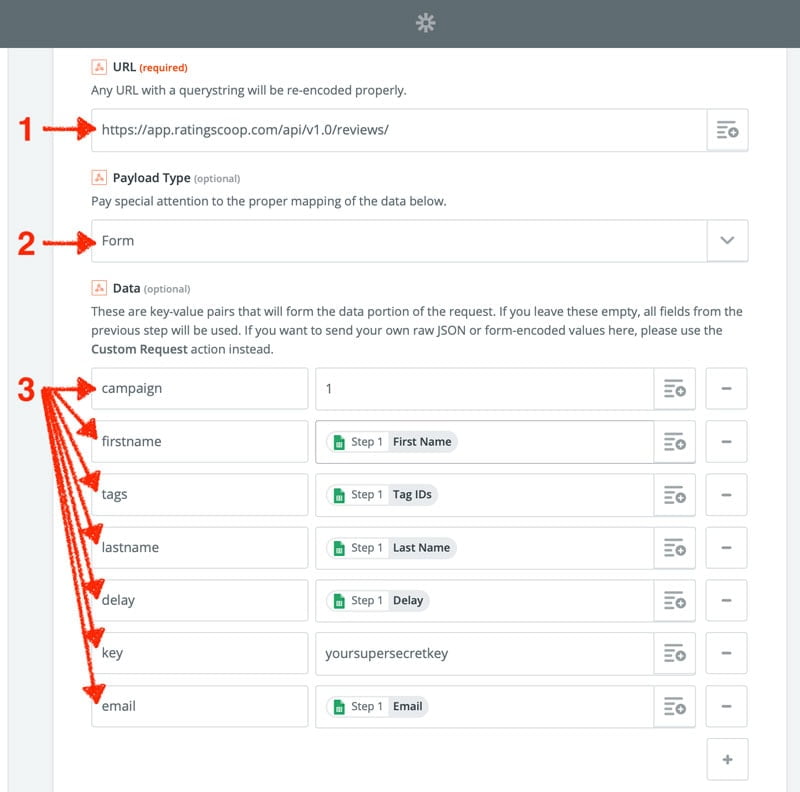
The key information you need to set is:
(1) URL: This is the Trust Vega review request endpoint:
https://app.trustvega.com/api/v1.0/reviews/(2) Payload Type: Leave this set to FORM
(3) Data: Add fields for each of the keys required by the Trust Vega API as per image above, and select the appropriate data values from your web app.
The keys required by Trust Vega are:
campaignkeyfirstnamelastnameemail
We recommend you hard code the campaign and key parameters. You may also wish to hard code the optional delay and tags parameters if these are desired.
For example, in the image above, I’ve mapped all the keys from the API review request endpoint to data from my spreadsheet, apart from the campaign and key parameters, which I’ve hard-coded with values from my Trust Vega account.
Leave all the other Webhook settings at default.
Once that’s all done, you’re ready to test the Webhook!
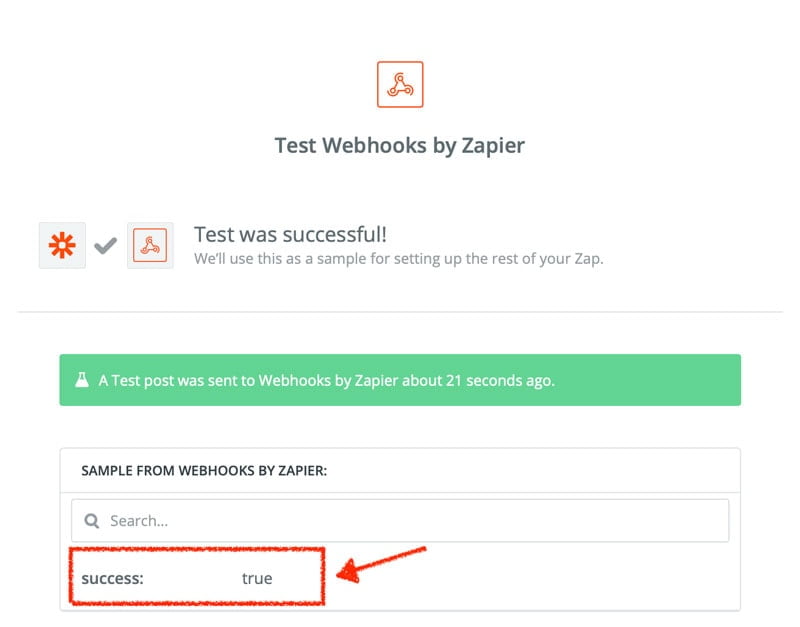
As long as you see a success response from Trust Vega, then it’s all set up ok!
If you get an error, then consult the API documentation to see which piece of information is missing or incorrect (contact us if you need help).
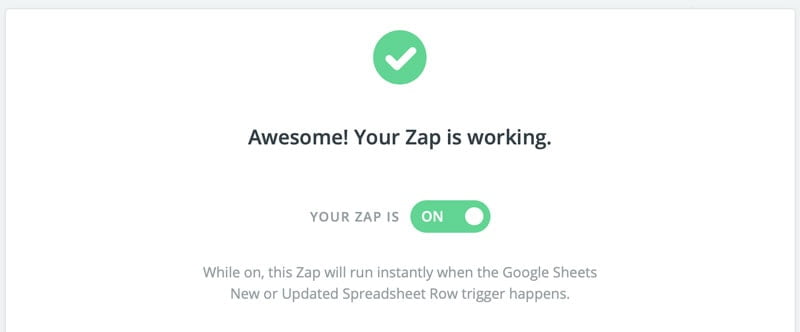
The final step is to activate your Zap – after that, it will all work automatically.
Ready To Automate Review Collection In Your Business?
API access an advanced feature available on our Pro plan.
